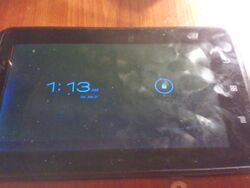
Zeki TB782B
Jump to navigation
Jump to search
| Zeki TB782B | |
|---|---|
 | |
| Manufacturer | Zeki |
| Dimensions | 196mm x 122mm x 13mm |
| Release Date | June 2012 |
| Website | Product page |
| Specifications | |
| SoC | A10 @ 1Ghz |
| DRAM | 1GB DDR3 @ xxxMHz |
| NAND | 8GB NAND |
| Power | DC 5V @ 3A, 2800mAh 3.7V Li-Ion battery |
| Features | |
| LCD | 7" 800x480 |
| Touchscreen | 5-point capacitive multi-touch (Manufacturer device FIXME) |
| Video | HDMI (Type C - mini) |
| Audio | 3.5mm headphone plug, HDMI |
| Network | WiFi 802.11 b/g/n |
| Storage | µSD |
| USB | 1 USB2.0 OTG |
| Camera | 0.3MP (640x480) front-facing |
| Other | Accelerometer (Manufacturer device FIXME) |
| Headers | UART, JTAG, I2C, USB2.0 host |
This page needs to be properly filled according to the New Device Howto and the New Device Page guide.
Identification
In android, under Settings->About Tablet, you will find:
- Model Number: TB782B
- Build Number: A10_sun4i_crane *
Sunxi support
Current status
No patches have been submitted.
Images
HW-Pack
BSP
Manual build
- For building u-boot, use the "MANUFACTURER_DEVICE" target.
- The .fex file can be found in sunxi-boards as MANUFACTURER_DEVICE.fex
Everything else is the same as the manual build howto.
Tips, Tricks, Caveats
FEL mode
There is a pinhole on right side that triggers FEL mode.
Adding a serial port (voids warranty)
Device disassembly
Start from the top left area. gently insert your plastic tool into the gap and go around the complete tablet counter-clockwise. there are no screws holding the tablet in place and no ribbons to be careful of.
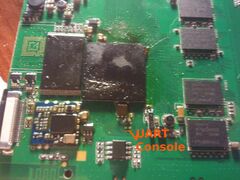
Locating the UART
There pads to the immediate left of the SoC are RX and TX, just solder on some wires according to the UART howto.
Pictures
This device urgently needs a set of decent pictures, as the first set was taken rather hastily and was never steady.


