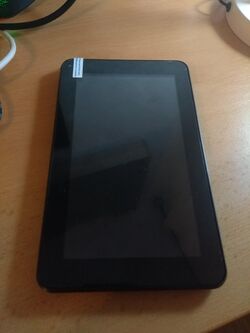
Navon
iQ7 2018
| Navon iQ7 2018 | |
|---|---|
 | |
| Manufacturer | Navon |
| Dimensions | 115mm x 10mm x 190mm |
| Release Date | 2018 |
| Specifications | |
| SoC | A64 @ 1.152Ghz |
| DRAM | 1GiB LPDDR2 @ 533(?)MHz |
| NAND | 8GB |
| Power | microUSB, 2500mAh 3.7V Li-Ion battery |
| Features | |
| LCD | 600x1024 (7" ~17∶10) |
| Touchscreen | 5-finger capacitive (Silead GSL1680) |
| Audio | 3.5mm TRRS headphone and microphone plug, internal speaker, internal microphone |
| Network | WiFi 802.11 b/g/n (Realtek RTL8703BS) |
| Storage | µSD |
| USB | 1x USB 2.0 OTG |
| Camera | 0.3MP (640x480) front (GalaxyCore GC0312), 2MP (1600x1200) rear (GalaxyCore GC2145) |
| Other | Accelerometer (Manufacturer device), GPS, IRDA |
| Headers | UART, JTAG, LCD, ... |
This page needs to be properly filled according to the New Device Howto and the New Device Page guide.
Identification
On the back of the device, the following is printed:
Navon iQ7 2018
The PCB has the following silkscreened on it:
AL-A64-86VH-V1.0
22DB_20180730
In android, under Settings->About Tablet, you will find:
- Model Number: iQ7_2018
- Build Number: Navon_V1.0_20180114
Sunxi support
Current status
Give a brief overview of the current status of support under sunxi here.
Images
Optional. Add MANUFACTURER DEVICE specific sunxi ROM images here. E.g. a livesuit image or some other linux image which uses linux-sunxi code. Do not put non-sunxi images here, they should live under See also. If no sunxi based images are available, this section can be removed.
HW-Pack
Optional. Add MANUFACTURER DEVICE sunxi HW-pack specifics here. When empty, this section can be removed.
BSP
Optional. Add MANUFACTURER DEVICE sunxi BSP specifics here. When empty, this section can be removed.
Manual build
You can build things for yourself by following our Manual build howto and by choosing from the configurations available below.
U-Boot
Mainline U-Boot
Use the MANUFACTURER_DEVICE build target.
Linux Kernel
Mainline kernel
Use the FAMILY-CHIP-DEVICE.dtb device-tree binary.
Tips, Tricks, Caveats
Add MANUFACTURER DEVICE specific tips, tricks, Caveats and nice to have changes here.
FEL mode
It is possible to enter FEL mode using the Volume Down button with this method or through the special SD card image.
Adding a serial port (voids warranty)
This section explains how to attach a serial port to the device. Make sure it refers to our UART howto. For a development board, you can just mention how to find the header with the pins and include a picture, and you can remove the warranty voiding warning.
Device disassembly
- Unscrew the two screws at the top of the device (the side with all the ports and buttons)
- Use a Plastic tool to unclip the back cover
Locating the UART
Describe how to find the RX,TX,GND signals here, and mention the UART howto.
Pictures
Also known as
List rebadged devices here.
See also
Add some nice to have links here. This includes related devices, and external links.
Manufacturer images
Optional. Add non-sunxi images in this section.


