INet 3F
| INet 3F | |
|---|---|
 | |
| Manufacturer | iNet Tek |
| Dimensions | 240mm x 185mm x 10mm |
| Release Date | October 2013 |
| Specifications | |
| SoC | A10 @ 1Ghz |
| DRAM | 1GiB DDR3 @ 432MHz |
| NAND | 8GB/16GB |
| Power | DC 5V @ 2A, 8000mAh 3.7V Li-Ion battery |
| Features | |
| LCD | 1024x768 (9.7" 4:3) |
| Touchscreen | 10-finger capacitive (Goodix GT801 2+1) |
| Video | HDMI (Type C - mini) |
| Audio | 3.5mm headphone plug, HDMI, internal stereo speakers, internal speaker, internal microphone |
| Network | WiFi 802.11 b/g/n (Realtek RTL8188CUS) |
| Storage | µSD |
| USB | 1 USB2.0 Host, 1 USB2.0 OTG |
| Camera | ZaReason Zatab:
Woxter PC97: TODO |
| Other | Accelerometer (Bosch BMA250) |
| Headers | UART |
Identification
ZaReason ZaTab
On the back of the device, the following is printed:
zareason
The PCB has the following silkscreened on it:
INET-3F-REV03
2012-02-06 ZGC
In Android, under Settings->About Tablet, you will find:
- Model Number: ZaTab
- Build Number: cm_zatab-userdebug 4.0.4 IMM76L eng.paulv.20120705.201823 test-keys
Polaroid MIDC010
The PCB has the following silkscreened on it:
INET-3F-REV06
2012-03-26 PYQ
In Android, under Settings->About Tablet, you will find:
- Model Number: MIDC010
Woxter PC97
The PCB has the following silkscreened on it:
INET-3F-REV06
2012-03-26 PYQ
Sunxi support
Current status
The device is supported and maintained in mainline U-Boot. There is no mainstream kernel support at this point. Linux (sunxi-3.4 branch) properly supports the device.
Manual build
- For building U-Boot, use the iNet_3F target.
- The .fex file can be found in sunxi-boards as inet_3f.fex
Everything else is the same as the manual build howto.
Mainline U-Boot
For building mainline U-Boot, use the iNet_3F target.
Tips, Tricks, Caveats
FEL mode
Sending '2' over UART at boot triggers FEL mode from boot1.
USB storage mode
Sending '1' over UART at boot triggers an USB storage mode that exposes the nanda partition as well as the Android external storage.
Reset button
The reset button (on the PCB) reboots the device.
Adding a serial port (voids warranty)

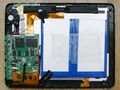
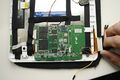
Device disassembly
The aluminium back case is very hard to detach from the rest of the device. In most cases, it will have to be damaged (or at least scratched) to open the device properly. There are no screws to remove nor any kind of glue, but the sides of the back case are curved to cover part of the front plastic part, making it stay it place very firmly. It is advised to use a a plastic tool and start opening at the corners of the case.
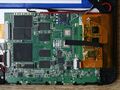
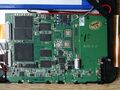
Locating the UART
The UART pads are exposed on the PCB, under the touchscreen ribbon cable, that has to be gently removed before soldering connectors. The pads are clearly labeled on the PCB: GND, Rx, Tx. Connectors can easily be soldered according to the UART howto. Ensure to cover the connectors with an isolating layer since the back of the touchscreen connector ribbon may have a conductive part.
Pictures
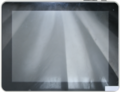


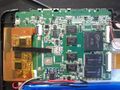
Polaroid MIDC010 (INET-3F-REV06)


Also known as
- ZaReason ZaTab
- Polaroid MIDC010
- Woxter PC97