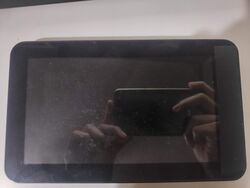
Eken t01a
| Eken t01a | |
|---|---|
 | |
| Manufacturer | Eken |
| Dimensions | widthmm x breadthmm x heightmm |
| Release Date | 2012 |
| Website | Device Product Page |
| Specifications | |
| SoC | A10 @ 1.008Ghz |
| DRAM | 384MiB DDR3 @ xxxMHz |
| NAND | 4GB |
| Power | DC 5V @ 3A, 3700mAh 3.7V Li-Ion battery |
| Features | |
| LCD | 800x480px (7" 16:9) |
| Touchscreen | 2-finger capacitive (Manufacturer device) |
| Video | mini HDMI |
| Audio | 3.5mm headphone plug, HDMI, internal speaker, internal microphone |
| Network | WiFi 802.11 b/g/n (Manufacturer device) |
| Storage | µSD |
| USB | 1 USB2.0 Host, 1 miniUSB2.0 |
| Camera | 0.3MP (640x480) front |
| Other | Accelerometer (Manufacturer device) |
| Headers | UART, LCD, VGA, ... |
This page needs to be properly filled according to the New Device Howto and the New Device Page guide.
Identification
Surprinsingly, on the back of the device there's no more than a Made in China label with a few regulatory logos.
The PCB has the following silkscreened on it:
T01A_V6
2012.02.06
In android, under Settings->About Tablet, you will find:
- Model Number: T01A
- Build Number: crane_evb-eng 4.0.3 IML74K 20120320 test-keys
Sunxi support
Current status
This device is still WIP, some stuff hasn't been tested. In fact, almost everything lives in personal repos. But you're more than welcomed to try them and open issues on broken stuff.
BSP
Optional. Add MANUFACTURER DEVICE sunxi BSP specifics here. When empty, this section can be removed.
Manual build
You can build things for yourself by following our Manual build howto and by choosing from the configurations available below.
U-Boot
Sunxi/Legacy U-Boot
Use the Eken_T01A build target.
Development currently is being done in a fork available here: https://github.com/SaulNunez/u-boot-sunxi-eken-t01a/tree/sunxi. Technically it should be ready, but I haven't had the time to set a build environment to get something to test.
Mainline U-Boot
WIP Almost ready, DTB for the device has basic support for hardware, NAND doesn't currently work.
Use the eken_t01a_defconfig build target.
Linux Kernel
Sunxi/Legacy Kernel
Use the eken_t01a.fex file.
Mainline kernel
Use the FAMILY-CHIP-DEVICE.dtb device-tree binary.
Tips, Tricks, Caveats
Add MANUFACTURER DEVICE specific tips, tricks, Caveats and nice to have changes here.
FEL mode
FEL mode is triggered by the reset button. It's located up, left of the volume rocker.
In a non powered state, press the reset button and the power on button, this will make the device boot up to FEL mode.
Device specific topic
If there are no further device specific topics to add, remove these sections.
...
Adding a serial port (voids warranty)
This section explains how to attach a serial port to the device. Make sure it refers to our UART howto. For a development board, you can just mention how to find the header with the pins and include a picture, and you can remove the warranty voiding warning.
Device disassembly
Opening this tablet requires removing two screws on the back. Now the device is only hold together by about ten plastic tabs. Grab the back cover from the right side with the ports, nudge a finger between the usb port and the back cover, try nudge your nails between the sides, the trick is making the back cover to bend to the outside to not put strain on the tabs.
Locating the UART
UART is located as tests pads near the A10 SoC.In some models, it is extremely easy to see which test pads need to be soldered to with a soldermask describing what signal they are carrying (see Connecting RS232 to T01a down bellow).
Pictures
Also known as
Supersonic SC-75MID
See also
Manufacturer images
Optional. Add non-sunxi images in this section.


