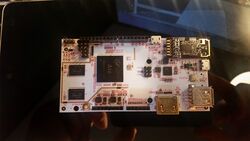
LinkSprite pcDuino Lite WiFi
| LinkSprite pcDuino Lite WiFi | |
|---|---|
 | |
| Manufacturer | Linksprite |
| Dimensions | 105mm x 53mm |
| Website | Product Page |
| Specifications | |
| SoC | A10 @ 1Ghz |
| DRAM | 256MiB DDR3 @ 408MHz (H5TQ1G83BFR) |
| NAND | 2GB |
| Power | DC 5V @ 2A (micro-USB) |
| Features | |
| Video | HDMI |
| Audio | HDMI |
| Network | WiFi 802.11b/g/n (Realtek RTL8188CUS) |
| Storage | µSD |
| USB | USB 2.0 Host, USB 2.0 OTG |
| Headers | UART, SPI, Arduino Compatible Headers |
Identification
A white PCB with an A10 chip and Arduino compatible headers on it. Sticker on the back of the board helpfully reads "pcDuino lite WiFi".
Sunxi support
Current status
- Supported by the upstream U-Boot and kernel
- Supported by legacy sunxi/legacy kernel v3.4
- Not supported by the legacy U-Boot, though basic implementation is available in 3rd party work-in-progress github branch.
Manual build
You can build things for yourself by following our Manual build howto and by choosing from the configurations available below.
U-Boot
Sunxi/Legacy U-Boot
This board is not supported by legacy U-Boot. Use pcDuino_Lite_WiFi_config from 3rd party development branch.
Mainline U-Boot
Config Linksprite_pcDuino_defconfig for LinkSprite_pcDuino works fine for pcDuino-Lite-WiFi board as well.
Linux Kernel
Sunxi/Legacy Kernel
Use the pcduino-lite-wifi.fex file.
Mainline kernel
- Use the default sunxi_defconfig kernel configuration file as a baseline, and run menuconfig to enable extra device drivers, such as USB keyboard/mouse or wireless dongle. For instance, enable CONFIG_RTL8192CU in order to make the onboard Realtek WiFi card work.
- Device-tree sun4i-a10-pcduino.dts for LinkSprite_pcDuino works fine for pcDuino-Lite-WiFi board as well. It may need to be tweaked depending on the Arduino shield in use.
HW-Pack
TODO
BSP
TODO
Tips, Tricks, Caveats
Building images using Yocto
Core images for pcDuino-Lite-WiFi board can be built using the following basic building blocks:
- poky: reference distribution of the Yocto Project
- meta-openembedded: collection of layers for the OE-core universe
- meta-sunxi: official sunxi OpenEmbedded layer for Allwinner-based boards
This README provides build instructions specific to pcDuino-Lite-WiFi board including the following configurations:
- images with sunxi/legacy U-Boot and kernel based on Yocto v1.8 Fido release
- images with upstream U-Boot and kernel based on Yocto v2.1 Krogoth release
Building images using Buildroot
Support for pcDuino boards has been added to buildroot. Build instructions are available in readme.txt. Follow the same instructions for pcDuino-Lite-WiFi.
FEL mode
The UPGRADE button (SW2) triggers FEL mode.
LEDs
The board has 5 yellow LEDs:
- LED1: power indicator (always on)
- LED2: WiFi indicator, connected to the WiFi chip
- LED3: labeled RX, accessible via GPIO (PH16 pin)
- LED4: labeled TX, accessible via GPIO (PH15 pin)
- LED5: labeled CLK, which is connected to the PI11 pin and can also have a dedicated use as SPI0_CLK. This CLK LED serves as either an SPI activity indicator when SPI hardware is connected or just an ordinary LED if no SPI hardware is present.
DRAM
RAM of the board is powered by two 128Mx8 DDR3 chips (Hynix H5TQ1G83BFR-H9C 215V), both on the front side of the PCB.
Compatibility with Arduino shields
The pcDuino has pinout pretty similar to the Arduino and implements an Arduino-style API (in C/C++), but it's not perfectly compatible with the Arduino platform.
Generally, the Arduino ADC reference voltage is AVCC = 5V, so its range is also 5V. However, the pcDuino ADC reference voltage is 3.3V, so pcDuino ADC range is only 3.3V. It works well with a 3.3V Arduino Uno R3. To measure a 5V signal with Arduino, use a voltage divider.
Adding a serial port
P3 header with 3 pins (TX - pin with square pad in the corner, GND, RX) exposes UART0. Make sure to refer to UART howto.
Pictures
See also
Manufacturer images
Manufacturer images for pcDuino Lite WiFi are available on LinkSprite download page


