Cubieboard/FirstSteps
Note: This is the FirstSteps for Cubieboard users.
Which is your Cubieboard model?
Currently, there are two batches of the Cubieboard developer board available.
- First batch, sold around August/September 2012. The Cubieboard in this batch has 512MB RAM.
- Second batch, sold through the Indiegogo campaign (November 2012), Shopify (January 2013), Miniand (January 2013). The Cubieboard in this batch has 1GB RAM.
It is important to identify which batch your Cubieboard is from, because the amount of memory has (currently) to be specified in your system image settings.
Unpacking the box
The Cubieboard is available in two packages, the Standard package and the Rich package.
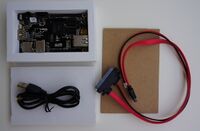
Cubieboard inventory - Standard package.
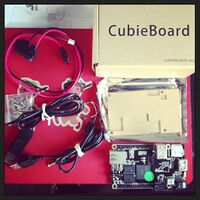
Cubieboard inventory - Rich package.
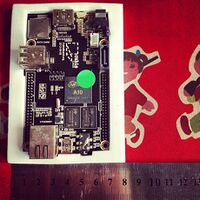
Cubieboard close-up.
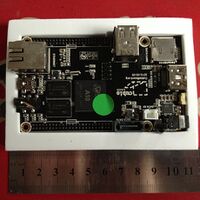
Cubieboard close-up.


The Standard package contains (from top left and counter-clockwise):
- The Cubieboard developer board
- SATA data cable and SATA power cable
- USB to DC power cable
- Cubieboard carton box (not shown)
The Rich package contains (from top left and counter-clockwise):
- SATA data cable and SATA power cable
- Back with screws (for transparent case)
- USB Serial cable
- USB to DC power cable
- Cubieboard carton box
- Transparent plastic case
- The Cubieboard developer board
Also checkout Cubieboard Unboxing and Quick Start Guide by CNXSoft.
Connecting the parts
Note: Some of the Cubieboards from the Indiegogo campaign may not have a suitable DC to USB cable. Check at Cubieboard/FaultyDCCable to see whether you are affected.
You can power your Cubieboard from either
- a USB to DC cable (provided)
- a USB to mini-USB cable
You plug the USB cable to your computer (5V/500mA) or any other USB power supply (such as one to charge your mobile phone), and the other end (either DC or mini-USB) to the appropriate port on the Cubieboard.
Connect the Cubieboard to your HDMI display/TV using an HDMI cable. Note that there has been some issues with HDMI to DVI adapters. Also, if your HDMI TV cannot display 720p, then it might not be able to display properly on the screen. The Android image allows to switch later on to the 1080p resolution (see System settings in Android).
You can connect a USB hub to the Cubieboard and then attach a keyboard and mouse. Note that if you connect several devices to the Cubieboard, then you will need to provide more power (for example, 500mA will probably be not enough).
You can also look for a PSP power supply (PSP is a Sony game console), which has a compatible barrel plug and provides 5V/2A, just like the Cubieboard needs.
WARNING: DO NOT CONNECT THE RED LINE TO VCC ON UART(serial ttl connection).
First startup

You powered the Cubieboard using either a USB to DC power cable or a powered USB to mini-USB cable. The Cubieboard should power on - the red POWER and green LED2 LEDs should light up.
See also this that shows the Cubieboard booting up using power from the USB OTG port.
If you start the Cubieboard without attaching a microSD card, then it will boot from the NAND flash memory. The Cubieboard has 4GB of internal memory (NAND Flash), which comes pre-loaded with Android 4.0 (ICS). Therefore, if you start the Cubieboard without a microSD card, then it will will boot into Android. For the first attempt to boot your Cubieboard, it is suggested to try Android.

Power Off and On
Once you connect the Cubieboard to the power, it will automatically boot up.
The red Power LED will light up when your Cubieboard is running. Depending on the operating system, you may also see the green LED2 LED light up (it lights up with Android but not with the Linux distributions).
It is recommended to shutdown the Cubieboard using the shutdown facility of the operating system. If you use Android, search Google Play for a Shutdown utility and install it. Then, you can shutdown from that utility. If you upgrade the Android image on the NAND memory to [Release 2], then there should be a Shutdown app already present. If you use a Linux distribution instead, then you can either power off from the GUI or run
sudo shutdown -h now
You can subsequently use the Power button to power on and off the Cubieboard. It is located on the left of the HDMI connector. You need to keep it pressed for a few seconds so that the Cubieboard starts up again.
You can force the Cubieboard to shutdown by keeping pressed the Power button for about 10 seconds.
Booting sequence
If a microSD card is present, then the Cubieboard will try to boot from the microSD card. If there is no microSD card present, then the Cubieboard will boot from the internal memory (NAND flash), which by default has Android 4.0.
It is possible to boot the Cubieboard from the network, or from a SATA disk.
You can find more details on the boot sequence at BROM
Installing images on the microSD card with BerryBoot
Berryboot is a simple operating system installation utility and boot selection screen, that allows you to put multiple Linux distributions on a single microSD card. To install it, you first need to copy the Berryboot system files to the microSD card. This can be done using the Android app or using a normal desktop computer.
Preparing the Berryboot microSD card using the Android SD card writer app
Downloading the App
Writing to the SD card


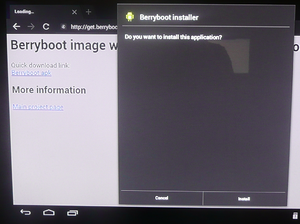
- Start your Cubieboard, and point the Android webbrowser to http://get.berryboot.com/
- Download, open and install the .apk you find there.
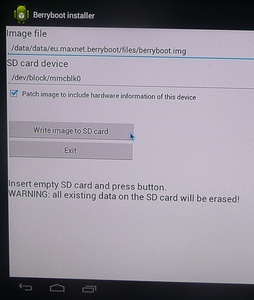
- Insert an empty SD card in your Cubieboard and press the "write image to SD card" button.
- After it has done writing, it will prompt you to reboot the Cubie and proceed with the main installation.
Preparing the Berryboot microSD card on a Windows computer
See also: Installing Ubuntu on the Cubieboard with Berryboot (video tutorial)
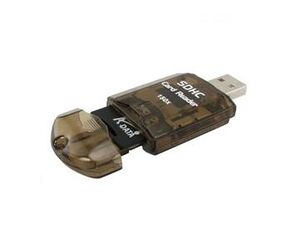
SD card USB adapter
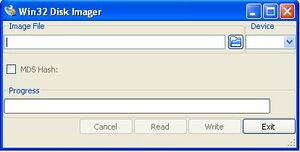
Win32DiskImager


- Put the microSD card into an adapter, and attach it to your computer.
- Download the "Berryboot-cubieboard-beta#.zip" from http://www.berryterminal.com/doku.php/berryboot_a10
- Download “win32diskimager-v#.#-binary.zip" from https://launchpad.net/win32-image-writer/
- Extract both .zip archives.
- Start Win32DiskImager.exe
- Click on the browse icon under "image file" -> go to the folder where you downloaded Berryboot -> select the *.* filter to see all files -> select "berryboot-cubieboard-beta#.img"
- Important: Double check that the correct disk drive corresponding to your SD card writer is selected under "device"
- Press "write".
- Once finished, put the microSD card into your Cubieboard, and apply power.
Main installation
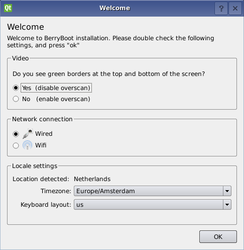
Locale selection
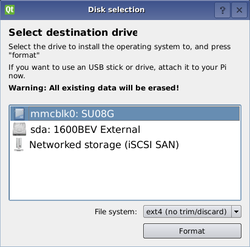
Disk selection
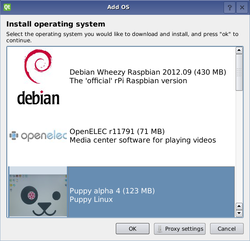
Choose an OS
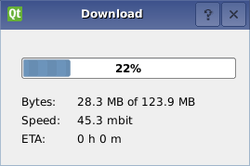
Downloading
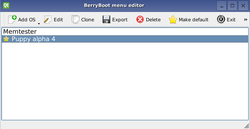
Menu editor


- In the first screen of the installation procedure you will be prompted for your timezone and keyboard layout settings. If the Cubie is connected to the Internet by network cable it will try to detect the settings automatically based on your location.
- Next you will be asked where you want to install the files of your operating systems. This can be on the microSD card itself, on a SATA harddisk, on an USB stick or on a NAS device such as those made by Synology and QNAP. In all cases having the microSD card inserted into the Cubie is still necessary to boot the system.
- Finally you can select which "operating system" you wish to install, such as Ubuntu, Puppy Linux or Debian. The files will be downloaded automatically over the Internet.
- Once the download finishes you will be directed to the Berryboot boot menu editor, where you can install additional operating systems, or press "exit" to reboot and start using your freshly installed operating system!
More information
Trying more bootable images
See the page Bootable_OS_images for additional bootable OS images. If you cannot find your favorite bootable image in the BerryBoot menu, you can install it manually to your microSD card. These image files (not to be confused with pictures) should be written directly to the memory of the microSD card, which removes all data on that card. If you use a Linux distribution, you would use dd (after you unmount the microSD card using palimptest or gnome-disks). Help expand this section with more detailed instructions!
You can also install an OS on the internal NAND
What went wrong? Kernel logs!
If your board comes with a serial cable, you can connect to see the cubieboard u-boot and kernel messages.
If not, then you can get yourself an appropriate serial cable (normally a USB to Serial dongle which allows connection to the individual pins).
You can troubleshoot the Cubieboard by making use of the serial console. See Cubieboard/TTL for detailed instructions and an example output.
External
- Whats in the Box? CubieBoard photos & OS photos
- Cubieboard photos on Flickt
- Category:Cubieboard and Cubieboard2 on Wikimedia commons.