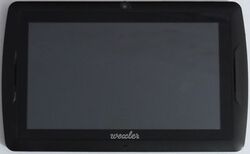
Wexler TAB 7200
| Wexler TAB 7200 | |
|---|---|
 | |
| Manufacturer | Wexler |
| Dimensions | 198mm x 123mm x 11mm |
| Release Date | August 2013 |
| Website | Product Page |
| Specifications | |
| SoC | A20 @ 1Ghz |
| DRAM | 1GiB DDR3 @ 384MHz |
| NAND | 4GB |
| Power | USB, 4000mAh 3.7V Li-Ion battery |
| Features | |
| LCD | 800x480 (7" 16:9) |
| Touchscreen | 5-finger capacitive (Goodix GT911) |
| Video | HDMI (Type C - mini) |
| Audio | 3.5mm headphone plug, HDMI, internal microphone, |
| Network | WiFi 802.11 b/g/n (Realtek RTL8192CU) |
| Storage | µSD |
| USB | 1 USB2.0 HOST, 1 USB2.0 OTG |
| Camera | 0.3MP (640x480) front |
| Other | Accelerometer (Domintech ARD06), reset button |
| Headers | UART |
Identification
In android, under Settings->About Tablet, you will find:
- Model Number: TAB7200
- Build Number: wing_mid-eng 4.2.2 *
Sunxi support
Current status
Everything working, except touchscreen and accelerometer.
Images
HW-Pack
BSP
Manual build
You can build things for yourself by following our Manual build howto and by choosing from the configurations available below.
U-Boot
Sunxi/Legacy U-Boot
Use the Wexler_TAB_7200 build target.
Upstream/Mainline U-Boot
Use the Wexler_TAB7200 target for building mainline U-Boot.
Linux Kernel
Sunxi/Legacy Kernel
Use the wexler_tab_7200.fex file.
Upstream/Mainline kernel
Use the sun7i-a20-wexler-tab7200.dtb device-tree binary for the mainline kernel.
Tips, Tricks, Caveats
FEL mode
The Volume down button triggers FEL mode.
Touchscreen
The touchscreen supported in mainline kernel via common goodix driver.
Accelerometer
No mainline support.
No driver in sunxi-3.4, patch can be found on our mailinglist.
Adding a serial port
Device disassembly
Careful insert your plastic tool in the space between the USB HOST port and the back cover. Then, gently move the tool towards the camera, and you should soon hear the clips popping. Move the plastic tool from edge to edge, until the back cover comes off.
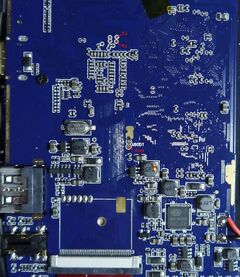
Locating the UART
There are some small pads on the bottom of the board, near the SoC. Solder on some wires according to our UART howto.


