Wedo HD22
| Wedo HD22 | |
|---|---|
 | |
| Manufacturer | WeDo Innovation |
| Dimensions | 93mm x 52mm x 17mm |
| Release Date | December 2012 |
| Website | WeDO HD22 |
| Specifications | |
| SoC | A20 @ 1Ghz |
| DRAM | 1GiB DDR3 @ 432MHz |
| NAND | 8GB |
| Power | DC 5V @ 1.5A (0.75mm/2.35mm barrel plug - center positive) |
| Features | |
| Video | HDMI (Type A - Full), 3.5mm A/V connector |
| Audio | HDMI, 3.5mm A/V connector, 3.5mm microphone connector, internal microphone |
| Network | WiFi 802.11 b/g/n (Realtek RTL8188ETV) |
| Storage | µSD |
| USB | 1x USB2.0 Host, 1x USB2.0 OTG |
| Camera | 5.0MP (2592x1944) front (Samsung S5K4EC/OmniVision OV5640) |
| Headers | UART |
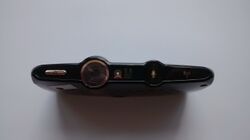
The WeDoInnov HD22 is an A20 based HTPC designed to look like a webcam. It comes with a mounting bracket so it can sit on the top of a TV set.
Identification
In android, under Settings->About Tablet, you will find:
- Model Number: TV BOX
- Build Number: HD22_4.2.2_V2.0_20140422
Sunxi support
Current status
Everything but the Samsung S5K4EC camera is supported.
Images
HW-Pack
BSP
Manual build
- For building u-boot, use the EU3000 target.
- The .fex file can be found in sunxi-boards as eu3000.fex
Everything else is the same as the manual build howto.
Tips, Tricks, Caveats
FEL mode
There is an extra button on the PCB which can be pushed via small hole on the device's right side, in the middle before the grill. Push it during power up and it will enter into FEL mode.
Camera
Some of the early models have OmniVision OV5640 camera. More recent models come with the Samsung S5K4EC, for which no driver is currently available.
Adding a serial port (voids warranty)
Device disassembly
The device is held together with three smalls screws and some plastic clips. Unscrew the three screws (one is under the QC label, this is slightly bigger then the rest), and a bit slide the bottom cover to the right (towards the two screw hole). This will unclip the plastics and you can easily detach them.
The PCB held in place by two screws on the top casing.
Locating the UART
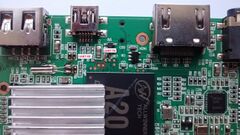
The UART pads can be found between the SoC and USB OTG connector. Just solder on some wires according to our UART howto. Be careful though, as the pads are tiny.


