MK808C
| MK808C | |
|---|---|
 | |
| Manufacturer | Unknown manufacturer |
| Dimensions | 88mm x 32mm x 16mm |
| Release Date | April 2013 |
| Website | Unknown product website |
| Specifications | |
| SoC | A20 @ 1Ghz |
| DRAM | 1GB DDR3 @ 384MHz |
| NAND | 8GB |
| Power | DC 5V @ 2A |
| Features | |
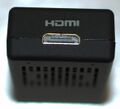
| Video | 3.5mm A/V plug, HDMI (Type C - mini) |
| Audio | 3.5mm A/V plug, HDMI (Type C - mini) |
| Network | WiFi 802.11 b/g/n (Realtek RTL8723AU) |
| Storage | µSD |
| USB | 1 USB2.0 Host, 1 USB2.0 OTG |
| Other | Bluetooth (Realtek RTL8723AU) |
| Headers | UART |
Identification
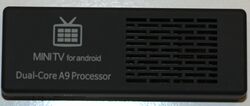
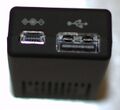
The casing and packaging is exactly the same as the MK808B which is why it shows Dual Core A9 Processor on the casing and references RK3066 on the packaging. There should be a small sticker on the packaging indicating it's the MK808C, though. The only indication that the device is a MK808C, without plugging it in, is a small 3.5mm A/V jack to the left of the OTG jack (neither the MK808 or MK808B have this).
In android, under Settings->About Tablet, you will find:
- Model Number: MK808C
- Build Number: "sugar_dongel_au8723-eng 4.2.2 JDQ39 20131214 test-keys" or "sugar_dongel_au8723-eng 4.2.2 JDQ39 20140225 test-keys"
Sunxi support
Current status
Supported.
Images
HW-Pack
BSP
Manual build
- For building u-boot, use the "mk808c_A20" target.
- The .fex file can be found in sunxi-boards as mk808c.fex
Everything else is the same as the manual build howto.
Mainline U-Boot
Use the MK808C_defconfig build target.
Mainline kernel
Use the sun7i-a20-mk808c.dtb device-tree file for the mainline kernel.
Tips, Tricks, Caveats
FEL mode
The FEL button can be found by placing a pin into the hole in the top right corner of the bottom of the device. Pressing when powering up triggers FEL mode.
Wifi and Bluetooth
There's no support for the Realtek 8723au in the sunxi-3.4 kernel, but a driver can be installed separately. On that page you can find instructions for installing the wifi driver and the bluetooth driver.
Adding a serial port (voids warranty)
Device disassembly
The case is fairly easy to open. Gently separate using a plastic tool, the pcb is sandwiched between the casing so just lift it out.
Locating the UART
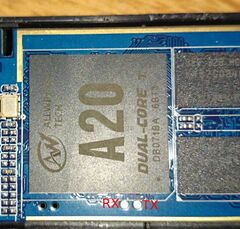
The TX and RX pins for UART 0 are next to the SoC. A good place to solder the GND connection is on the pin to the HDMI connector which sticks through the board. More information is available at our UART howto.
ADB
The device is factory rooted but so far ADB over USB hasn't been possible. To use ADB install a SSH Server like SSHDroid and start up the service. With the information provided by the Android App you can remotely log into the device(the login prompt displays the password. Type "adb shell" to enter ADB mode.
Pictures
Also known as
See also
Manufacturer images
- Android 4.2.2 image (Build Number: sugar_dongel_au8723-eng 4.2.2 JDQ39 20131214 test-keys) - the file name is labelled MK818, but it has been tested to work with the MK808C
- Android 4.2.2 image (Build Number: sugar_dongel_au8723-eng 4.2.2 JDQ39 20140225 test-keys)
- Android 4.2.2 image (Build Number: sugar_dongel_au8723-eng 4.2.2 JDQ39 20140528 test-keys)


