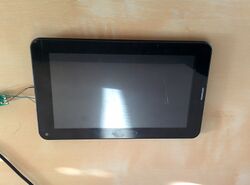
Inet k70e
| Inet k70e | |
|---|---|
 | |
| Manufacturer | Inet |
| Dimensions | 191mm x 115mm x 13mm |
| Release Date | August 2013 |
| Website | Device Product Page |
| Specifications | |
| SoC | A20 @ 1Ghz |
| DRAM | 1GiB DDR3 @ ???MHz |
| NAND | 4GB |
| Power | DC 5V @ ??A, ??00mAh ?.?V Li-Ion battery |
| Features | |
| LCD | 800x600 (7" 16:9) |
| Touchscreen | X-finger capacitive/resistive (Focaltech ??? FIXME) |
| Video | HDMI (Type C, mini) |
| Audio | 3.5mm headphone plug, HDMI, SPDIF, internal stereo speakers, internal speaker, internal microphone |
| Network | WiFi 802.11 b/g/n (TODO: Manufacturer device) |
| Storage | µSD |
| USB | 1 USB2.0 OTG |
| Camera | ??.?MP (????x????) front, ??.?MP (????x????) rear |
| Other | Accelerometer (TODO: Manufacturer device) |
| Headers | UART, JTAG |
This page needs to be properly filled according to the New Device Howto and the New Device Page guide.
Identification
In android, under Settings->About Tablet, you will find:
- Model Number: JDQ39 WTF, this is the id string for Android 4.2.2
- Build Number: wing_ibt-eng 4.2.2 JDQ39
Sunxi support
Current status
No sunxi-boards or u-boot-sunxi patches have been made available yet, but this can be trivially done following the New Device howto. Touchscreen doesn't work yet, but apparently ft5x_ts.c can be hacked to make it work.
Images
HW-Pack
BSP
Manual build
- For building u-boot, use the "MANUFACTURER_DEVICE" target.
- The .fex file can be found in sunxi-boards as MANUFACTURER_DEVICE.fex
Everything else is the same as the Manual build howto.
Tips, Tricks, Caveats
FEL mode
The something button triggers FEL mode.
Adding a serial port (voids warranty)
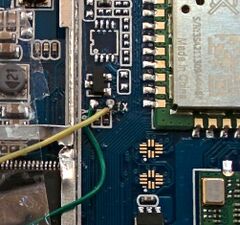
![]() WARNING: Do not attach VCC like the person who made this picture. This might harm your device.
WARNING: Do not attach VCC like the person who made this picture. This might harm your device.
Disassembling the device
Provide a short description of how to open the device. Perhaps explain how the pins can be most easily popped.
Locating the UART
There are 2 pads labelled "RX" and "TX" between the SoC area and the GSM/GPRS module. You can get Ground from anywhere else on the board. All you have to do is follow the UART howto to solder on some wires.
Pictures
Also known as
List rebadged devices here.


