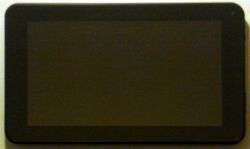
Inet 86vz
| Inet 86vz | |
|---|---|
 | |
| Manufacturer | Inet-Tek |
| Dimensions | 191mm x 116mm x 12mm |
| Release Date | July 2013 |
| Website | Rebadger Product Page |
| Specifications | |
| SoC | A13 @ 1Ghz |
| DRAM | 512MiB DDR3 @ 432MHz |
| NAND | 4GB |
| Power | USB, 2000mAh 3.7V Li-Ion battery |
| Features | |
| LCD | 800x480 (7" 10:6) |
| Touchscreen | 5-finger capacitive (Silead GSL1680) |
| Audio | 3.5mm headphone plug, internal speaker, internal microphone |
| Network | WiFi 802.11 b/g/n (Realtek RTL8188ETV) |
| Storage | µSD |
| USB | 1x USB2.0 OTG |
| Camera | 0.3MP (640x480) front-facing |
| Other | Accelerometer (Manufacturer device FIXME), reset button |
| Headers | UART |
Identification
In android, under Settings->About Tablet, you will find...
Freelander PH20
- Model Number: SXZ-PH20
- Build Number: A13_86VZ_M758C2_*.*
TAB LC7
- Model Number: LC7
- Build Number: 4.2.27LCF20130913
Sunxi support
Current status
Supported.
Images
HW-Pack
BSP
Manual build
- For building u-boot, use the "INet_86VZ" target.
- The .fex file can be found in sunxi-boards as inet_86vz.fex
Everything else is the same as the Manual build howto.
Tips, Tricks, Caveats
FEL mode
The vol+ button triggers FEL mode.
USB OTG port
This device comes with only a single USB port, and has no separate power connector. It therefor is only of limited use as a standalone desktop style device, as connecting a keyboard and/or mouse will only work as long as the battery lasts.
NAND chip
Currently (20140117) NAND access is not possible in our sunxi kernels. This is because the Samsung K9GBG08U0M is not known by libnand. A patch exist which adds support for this NAND chip. That patch should be integrated soon.
Installing to NAND
Awkwardly, the Freelander PH20 default image came with a 16MB boot partition, but the FAT filesystem on it thought it was 128MB large. You will have to create a fresh FAT filesystem when installing to NAND.
Adding a serial port (voids warranty)
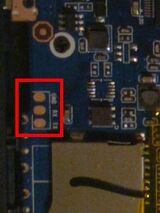
This device exposes a nice set of pads on the mainboard, but there's a catch. These pads are wired to the SD controller, and you can choose, either have an SD card, or have serial. You cannot have both.
Here is a record of how i had to bend backwards to get this solved.
Device disassembly
Remove the two screws on the side with the connectors.
Now gently insert your plastic tool in the space between the connector face and the back. You should soon hear the plastic clips popping. Be careful when removing the back, as the speaker is lightly glued to it.
Locating the UART
There are nice pads labelled "GND", "RX" and "TX" below the SD card. All you have to do is solder on some wires.


