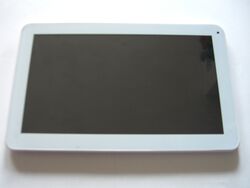
IRULU X11
| IRULU X11 | |
|---|---|
 | |
| Manufacturer | [1] |
| Dimensions | 261mm x 163mm x 11mm |
| Release Date | Month year |
| Website | [2] |
| Specifications | |
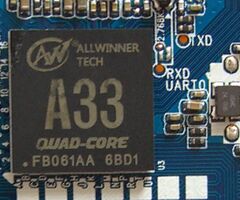
| SoC | A33 @ 1,3Ghz |
| DRAM | 1GiB DDR3 @ 384MHz |
| NAND | 8/16GB |
| Power | DC 5V @ 2A, 5500mAh 3.7V Li-Ion battery |
| Features | |
| LCD | 1024x600 (10.1" X:Y) |
| Touchscreen | 5-finger capacitive (Silead GSL3676) |
| Video | None |
| Audio | 3.5mm headphone plug, internal speaker, internal microphone |
| Network | WiFi 802.11 b/g/n, Bluetooth 4.0 (RTL8723cs) |
| Storage | µSD |
| USB | 1 USB2.0 OTG |
| Camera | 0.3MP (640x480) front, 2.0MP (1600x1200) rear |
| Other | Accelerometer (Manufacturer device) |
| Headers | None |
This page needs to be properly filled according to the New Device Howto and the New Device Page guide.
A low-cost tablet with a 1024x600 display. It is also called iRULU eXpro X1Plus.
Identification
There are two version of this tablet available. Both has the following printed on the back of the device:
Model No.: X11
POWER SOURCE: 5V 2.0A max
Designed by iRULU in USA
Assembled in China
In android, under Settings->About Tablet, you will find:
- Model Number: X11
- Android version: 5.1.1
- Firmware version: v3.3rc5
- Kernel version: 3.4.39 builder11@YHK-T620 #36 Fri Sep 18 19:12:16 CST 2015
- Build Number: LMY47V.20150918
Version 1.1
The PCB has the following silkscreened on it:
PHT
MID_V108_V1.1
MAINBOARD_V1.1
151228
Version 1.2
The PCB has the following silkscreened on it:
PHT_V108_V1.2_0901
160901
Differences 16GB Version
| Hardware | Version 1.1 | Version 1.2 |
|---|---|---|
| NAND | 2x SK hynix H27UCG8T2ETR | 1x SK hynix H26M52002CKR |
| RAM | 2x Samsung K4B4G08468-HCH9 | 2x Micron PE028 6HP77 D9SGR 125 (can not read) |
| WLAN | RTL8723bs | RTL8723cs |
Sunxi support
Current status
TODO
- find the accelerometer on the pcb :)
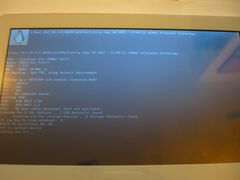
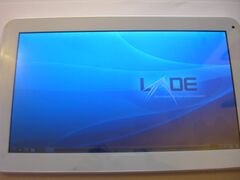
You can boot uboot/linux with this device and the basic things are working. I'm using here Arch Linux ARM.
| Hardware | mainline linux | Note | |
|---|---|---|---|
| v1.1 | v1.2 | ||
| CPUfreq | working | working | |
| LCD | no | no | works, but not good (colorless, less gamma), needs probably an init sequence (see here: starry768x1024.c, this module is used by the Android OS) |
| Backlight | working | working | |
| Touchscreen | not tested yet | working | needs firmware "gsl1680e_101.fw" extraxted from gslX680new.ko, using ts_uinput from tslib |
| W-LAN | rtl8723bs working |
rtl8723cs not tested yet |
rtl8723bs is in staging since linux-4.12 (also a firmware is needed) / rtl8723cs is available out of tree |
| Bluetooth | not tesetd yet | not tested yet | |
| Sound | not tested yet | not tested yet | |
Images
Optional. Add MANUFACTURER DEVICE specific sunxi ROM images here. E.g. a livesuit image or some other linux image which uses linux-sunxi code. Do not put non-sunxi images here, they should live under See also. If no sunxi based images are available, this section can be removed.
HW-Pack
Optional. Add MANUFACTURER DEVICE sunxi HW-pack specifics here. When empty, this section can be removed.
BSP
Optional. Add MANUFACTURER DEVICE sunxi BSP specifics here. When empty, this section can be removed.
Manual build
You can build things for yourself by following our Manual build howto and by choosing from the configurations available below.
U-Boot
Sunxi/Legacy U-Boot
Use the MANUFACTURER_DEVICE build target.
Mainline U-Boot
Use the MANUFACTURER_DEVICE build target.
Linux Kernel
Sunxi/Legacy Kernel
Use the MANUFACTURER_DEVICE.fex file.
Mainline kernel
Use the FAMILY-CHIP-DEVICE.dtb device-tree binary.
Tips, Tricks, Caveats
Add MANUFACTURER DEVICE specific tips, tricks, Caveats and nice to have changes here.
FEL mode
The Volume+ button triggers FEL mode. Verify with sunxi-fel:
sunxi-fel -l
USB device 008:010   Allwinner A33     0461872a:035400c2:9ab76905:00000000

sunxi-fel version
AWUSBFEX soc=00001667(A33) 00000001 ver=0001 44 08 scratchpad=00007e00 00000000 00000000
Device specific topic
If there are no further device specific topics to add, remove these sections.
...
Adding a serial port (voids warranty)
There are UART pads available on this device, but they are not tested and probably multiplexed with the microSD adapter.
Device disassembly
This can easily be done with a Plastic tool or a sharp fingernail.
Locating the UART
UART is located next to the CPU A33.
Pictures
Version 1.1
Version 1.2
Also known as
List rebadged devices here.
See also
- more infos on this external site
Manufacturer images
Optional. Add non-sunxi images in this section.


