Digma iDj7n
| Digma iDj7n | |
|---|---|
| img | |
| Manufacturer | [Digma] |
| Dimensions | widthmm x breadthmm x heightmm |
| Release Date | Month year |
| Website | Device Product Page |
| Specifications | |
| SoC | A13 @ XGhz |
| DRAM | 512MiB DDR3 @ xxxMHz |
| NAND | 4 Gb |
| Power | DC 5V @ 3A, 2800mAh 3.7V Li-Ion battery |
| Features | |
| LCD | WidthxHeight (7" 800:480) |
| Touchscreen | 5-finger capacitive (Silead GSL1680) |
| Video | -- |
| Audio | 3.5mm headphone plug,internal speaker, internal microphone |
| Network | WiFi 802.11 b/g/n (Realtek RTL8188ETV) |
| Storage | µSD |
| USB | 1 USB2.0 OTG |
| Camera | ??.?MP (????x????) front, ??.?MP (????x????) rear |
| Other | Accelerometer (manufacturer device), GPS, IRDA |
| Headers | UART, JTAG, LCD, VGA, ...1 |
This page needs to be properly filled according to the New Device Howto and the New Device Page guide.
If a device is special, then feel free to provide a terse description of what makes this device so special. But terse, no novels, no marketing blurb.
Identification
This section explains how to most easily identify your device. For a development board, explain the name(s) printed on the board. For an android device, find out the strings as reported under settings.
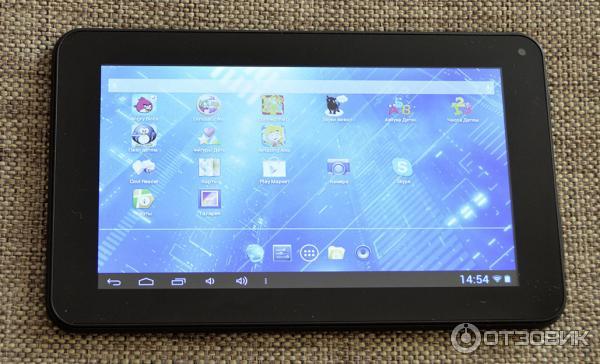
On the back of the device, the following is printed:
Digma
Digma iDj7n
The PCB has the following silkscreened on it:
--
In android, under Settings->About Tablet, you will find:
- Model Number: iDj7n
- Build Number: A13_86VS_M758C1_*number* (I have non-official firmware)
Sunxi support
Current status
20-11-2014 WIP; have a bootable prototype
05-05-2015 Ponies ^_____^ [unfreezing a project]
20-11-2017 [unfreezing a project] (still in pony-mode)
Images
Add MANUFACTURER DEVICE specific sunxi ROM images here. E.g. a livesuit image or some other linux image which uses linux-sunxi code. Do not put non-sunxi images here, they should live under See also. If no sunxi based images are available, this section can be left blank.
HW-Pack
Add MANUFACTURER DEVICE HW-pack specifics here. This section can be left blank.
BSP
Add MANUFACTURER DEVICE BSP specifics here. This section can be left blank.
Manual build
- For building u-boot, use the MANUFACTURER_DEVICE target.
- The .fex file can be found in sunxi-boards as MANUFACTURER_DEVICE.fex
Everything else is the same as the manual build howto.
Mainline U-Boot
If there is mainline u-boot support, add this section.
For building mainline u-boot, use the MANUFACTURER_DEVICE target.
Don't forget to add[[Category:Mainline_U-Boot]]at the bottom of the page.
Mainline kernel
If there is mainline kernel support, add this section.
Use the FAMILY-CHIP-DEVICE.dtb device-tree file for the mainline kernel.
Don't forget to add[[Category:Mainline_Kernel]]at the bottom of the page.
Tips, Tricks, Caveats
Add MANUFACTURER DEVICE specific tips, tricks, Caveats and nice to have changes here.
FEL mode
The volume+ button triggers FEL mode. Press VOL+, PWR, wait 2-3 sec, press PWR 3-5 times again, release VOL+.
FEL SD image don't work.
Device specific topic
If there are no further device specific topics to add, remove these sections.
...
Adding a serial port (voids warranty)

This section explains how to attach a serial port to the device. Make sure it refers to our UART howto. For a development board, you can just mention how to find the header with the pins and include a picture, and you can remove the warranty voiding warning.
Device disassembly
If necessary, provide a short description of how to open the device. Perhaps explain how the pins can be most easily popped. If pins do need to be popped, mention the Plastic tool howto.
Locating the UART
Describe how to find the RX,TX,GND signals here, and mention the UART howto.
Pictures
Take some pictures of your device, upload them, and add them here. DO NOT UPLOAD PICTURES WHICH YOU PLUCKED OFF THE INTERNET.


Also known as
List rebadged devices here.
See also
Add some nice to have links here. This includes related devices, and external links.
Manufacturer images
Optional. Add non-sunxi images in this section.