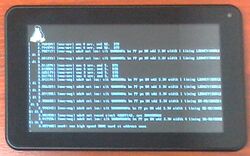
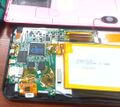
Prestigio PMP3670B
| Prestigio PMP3670B | |
|---|---|
 | |
| Manufacturer | Manufacturer web page |
| Dimensions | 192 mm x 116 mm x 10.7 mm |
| Release Date | May 2013 |
| Website | Product page |
| Specifications | |
| SoC | A13 @ 1Ghz |
| DRAM | 512MiB @ 408MHz |
| NAND | 4GB |
| Power | DC 5V microUSB, 3200mAh 3.7V Li-Ion battery |
| Features | |
| LCD | 800x480 (7" 16:9) |
| Touchscreen | 5-finger capacitive (Silead GSLX680) |
| Audio | 3.5mm headphone plug, internal speaker |
| Network | WiFi 802.11 b/g/n (Realtek RTL8188EUS) |
| Storage | µSD |
| USB | 1 USB2.0 OTG |
| Camera | 0.3MP (640x480) front (gt2005) |
| Other | Accelerometer (Domintech DMARD10), RTC (pcf8563) |
This page needs to be properly filled according to the New Device Howto and the New Device Page guide.
Identification
The back of the tablet reads:
Prestigio Multipad 7.0 Ultra+
Tablet PC|PMP3670B
The board has the following printed on it:
A86 MB V4.0
2013/01/31
In android, under Settings->About Tablet, you will find:
- Model Number: PMP3670B
- Build Number: PMP3670B.2013.10.14.4.01.02
Note that there two different versions of this tablet. The ones with the black screen frame and different color back covers is what is currently documented here. There is also a version with a white screen frame and a white cover, which supposedly is somewhat incompatible with this device, as it at least has a different touchscreen controller.
Sunxi support
Current status
Supported.
Tested:
- boot from SD card - mmc0
- PMU
- original nand flash content access
- LCD
- USB OTG (ethernet gadget)
- USB HOST (wifi)
- tablet keys
Untested (should work):
- mali
- cedar
Detected by kernel but needs testing:
- rtc
- USB WiFi
- audio
Unknown:
- accelerometer
- camera
- touchscreen
Images
HW-Pack
BSP
Manual build
- For building u-boot, use the prestigio_pmp3670b target.
- The .fex file can be found in sunxi-boards as prestigio_pmp3670b.fex
Everything else is the same as the manual build howto.
Tips, Tricks, Caveats
FEL mode
Powering on an A13 tablet requires somewhat longish press of the power button. If during that time Vol+ or Vol- is pressed repeatedly (~5 times) FEL mode is activated instead of powering on normally.
Enabling ADB
To enable ADB go to tablet info and tap the build number multiple (~7) times. Then in tablet settings debugging options appear. At the very top of debugging options a switch in OFF posistion is shown. Change to ON and find USB debugging in the list of options below. Tick the checkbox.
Rooting
rootdashi (Chinese) appears to root the tablet.
As advised here you should use su in adb shell to get root access.
Adding a serial port (voids warranty)
The device has no useful UART pads, as pins that would be usable for UART are in use by other devices. You can either use a µSD breakout board or disable the camera and locate the usable UART pins on the camera connector .
Device disassembly
Remove two screws on the connectors side. Then carefully use your Plastic tool to pop the clips on the back cover by pushing the back cover out, only on the sides without the connectors. The connector side will come free when the other 3 sides are released. When re-assembling, replace the connector side first.
Pictures
Also known as
- Eli Lilly 4G Tablet
See also
Manufacturer pictures of the case:
Manufacturer images
- download link for current firmware http://de05.dl.prestigio.com/Service_Files/TabletPC/PMP3670B/PMP3670B.20131014.4.01.02.zip
Current firmware is not available from this site. Black firmware should work with non-white colour variants - eg. black display frame with different colour back covers. Reportedly flashing black firmware on white tablet causes touchscreen to stop working.


