Inet K970
| Inet K970 | |
|---|---|
 | |
| Manufacturer | Inet Tek |
| Dimensions | 260 mm x 170 mm x 11,5 mm |
| Release Date | August 2014 |
| Website | Board page |
| Specifications | |
| SoC | A20 @ 1 Ghz |
| DRAM | 1GiB DDR3 @ 408 MHz |
| NAND | 8 GB |
| Power | DC 5V @ 2A, 8000mAh 3.7V Polymer battery |
| Features | |
| LCD | 1024x768 (9.7" 4:3) |
| Touchscreen | 5-finger capacitive (Focaltech FT5406EE8) |
| Video | HDMI (Type C - mini) |
| Audio | 3.5mm headphone plug, HDMI, internal stereo speakers, internal microphone |
| Network | WiFi 802.11 b/g/n (Realtek RTL8723AU) |
| Storage | µSD |
| USB | 1 USB2.0 Host, 1 USB2.0 OTG |
| Camera | 0.3MP (640×480) front (Device: gc0308), 2.0MP (1616×1232??? Why is this not 1920x1080???) rear (Device: gc2035) |
| Other | Accelerometer (Freescale MMA8652 / Freescale MMA8653), Bluetooth (Realtek RTL8723AU), Buttons |
| Headers | UART |
This page needs to be properly filled according to the New Device Howto and the New Device Page guide.
Identification
On the back of the device, the following is printed:
Tristan Auron
Planet 1
The PCB has the following silkscreened on it:
INET-K970-REV02
Zeng-gc
2013-08-27
In android, under Settings->About Tablet, you will find:
- Model Number: planet 1
- Build Number: A20_K9701_K9701L2B_1210239.20121030
Sunxi support
Current status
Supported by the legacy u-boot-sunxi and sunxi-3.4 kernel.
Only partially working are:
- Bluetooth
Currently broken for A20 is:
- USB OTG
No drivers or suitable dts are readily at hand for the following devices:
- Power Status, (mainline, in RFC state, see following thread)
- Nand (mainline, see MTD Driver)
- G-Sensor
- Cameras
Images
HW-Pack
BSP
Manual build
- u-boot-sunxi is deprecated, use mainline u-boot as delineated below.
- The .fex file can be found in sunxi-boards as inet_k970.fex
Everything else is the same as the Manual build howto.
Mainline U-Boot
Fix target naming. For building mainline u-boot, use the Tristan_Auron_Planet_1_defconfig target.
A patch is currently under review.
Until the patch and new various features hit the main repository, use the following u-boot as mainline:
$ git clone -b sunxi-wip https://github.com/jwrdegoede/u-boot-sunxi/tree/sunxi-wip
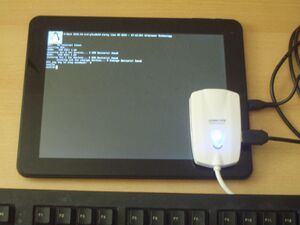
In particular, this allows an u-boot dialog using an usb-keyboard and the tablet's LCD.
Mainline kernel
Use the sun7i-a20-inet-k970.dtb (once accepted) device-tree file for the mainline kernel.
Tips, Tricks, Caveats
FEL mode
The Vol+ button triggers FEL mode.
Reset button
Like with most Inet-tek tablets, a reset button is available through the pinhole on the back.
Adding a serial port (voids warranty)
While the UART is located as delineated below and works properly, note that this is an option, and I'm not advising to use it. I fact, I for one was not able to get the touchscreen going again, after reconnecting the ribbon. In case you do need an UART, which I didn't, you might want to consider using a less intrusive approach, e.g. the MicroSD_Breakout. Additionally, current mainline U-boot provides output to HDMI, until you have setup LCD parameters.
Device disassembly
To open the tablet, first remove the two screws on the connector's side. As the picture aside shows, the back cover can most safely be lifted from the side opposite to the connectors. Try using a Plastic tool. A spool-like tool, shown with the opened device, worked better for me. Before trying to open the tablet, notice the eyelets on the back cover clearly visible both at the cover itself and its shadows. I found it best to open it first at one of the loops in the middle. Further take care of the speaker cables when lifting the back cover.
Locating the UART
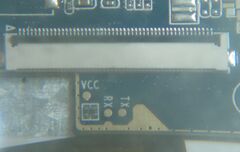
The RX,TX pads are hidden under the touchscreen ribbon located on the right side of the board's front picture. To remove the ribbon, lift the connector's lever visible as a narrow dark bar at the upper edge of the white connector. The ribbon is released then and can be pulled out of the connector without force. The GND is textually marked at another place on the board close to the right upper edge of the board's front picture and connected to the large copper area. See the gallery below for details.


