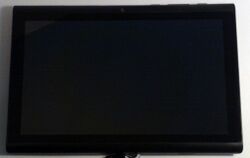
Hyundai A7HD
| Hyundai A7HD | |
|---|---|
 | |
| Manufacturer | Hyundai Digital (defunct) |
| Dimensions | 174mm x 118mm x 8.9mm |
| Release Date | April 2012 |
| Website | Product Page(defunct) |
| Specifications | |
| SoC | A10 @ 1Ghz |
| DRAM | 1GiB DDR3 @ 360MHz |
| NAND | 8GB |
| Power | DC 5V, 3400mAh 3.7V Li-Ion battery |
| Features | |
| LCD | 1024x600 (7" 17:10 FFS-IPS) |
| Touchscreen | 5-point capacitive (Goodix GT801) |
| Video | HDMI (Type C - mini) |
| Audio | 2.5mm headphone plug, built-in microphone, HDMI |
| Network | WiFi 802.11 b/g/n (Realtek RTL8188CUS) |
| Storage | µSD |
| USB | 1 USB2.0 OTG |
| Camera | 0.3MP (640x480) front |
| Other | Accelerometer (Manufacturer device FIXME) |
| Headers | UART |
Identification
On the back of the device, the following is printed:
S7-S
... With Android
Designed by Lovendesign in China
Assembled in China
The PCB has the following silkscreened on it:
RK-S7S01-V1.2_20120215
In android, under Settings->About Tablet, you will find:
- Model Number: A7 HD
- Build Number: RKS7S01_A7HD_20120412
Sunxi support
Current status
Supported. Touchscreen unknown.
Images
HW-Pack
BSP
Manual build
- For building u-boot, use the hyundai_a7hd target.
- The .fex file can be found in sunxi-boards under as hyundai_a7hd.fex
Everything else is the same as the manual build howto.
Mainline kernel
Use the sun4i-a10-hyundai-a7hd.dts device-tree file for the mainline kernel.
Tips, Tricks, Caveats
FEL mode
There are 4 buttons on the A7HD, the left one is the powerbutton, and any of the three other buttons can be used to trigger FEL mode, as described in the FEL mode howto.
Flaky WiFi
The A7HD has a known issue with less than ideal WiFi reception. The fix is to re-route the WiFi antenna, but in order to do that you need to partly disassemble your device and remove the back.
Further information can be found in this android forum post.
Powerdown with UART attached
The A7HD suffers from the same problem as other A10 devices. When you power down with the UART still attached, some power continues to flow into the device, and it will not power down properly. So disconnect the UART if you need to do a proper power down.
Adding a serial port (voids warranty)
Device disassembly
Carefully insert your plastic tool into the long edges, and push the plastic outwards while pushing the aluminium back plate inward, and work the whole 2 long sides. Now insert your plastic tool into the short edge, and push the aluminium backplate outwards.
Locating the UART
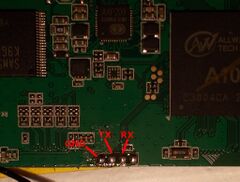
There are some pre-tinned pads available on the front side of the motherboard, right next to the SoC. All you have to do is attach some wires according to our UART howto. Use very thin wires to export this UART, as otherwise you will get pressure points on your LCD and your back cover might not fit properly anymore.
Pictures
Also known as
- The most common name is Hyundai A7HD, even though the motherboard states RK-S7S01
- Sold as Cherry Mobility M-728 by the Kruidvat store chain in Holland.
- Yarvik GoTab Ion 7" (TAB275)


